How To Change Background Color For Instagram Story
Alright, gather 'round, you digital divas and dudes! Ever find yourself staring at a perfectly good Instagram Story, but the background color is just… meh? Like a beige sweater on a rainbow-themed party? Yeah, we’ve all been there. You’ve got your amazing photo, your witty caption that took you way too long to craft, and then BAM! That drab background is sucking all the joy out of your masterpiece. Don't worry, your friendly neighborhood social media sorceress (that's me, btw, and I have a PhD in emoji placement) is here to rescue you from the clutches of boring backgrounds. It's not rocket science, folks. In fact, it's probably easier than assembling IKEA furniture, which, let's be honest, is a feat of human endurance worthy of an Olympic medal.
So, you want to jazz up your Instagram Story background? You're in luck! Instagram, in its infinite digital wisdom, has provided us with a few nifty ways to do this. Think of it like picking out the perfect lipstick for your outfit – it can elevate the whole look. And trust me, your Stories deserve to look fabulous. Forget those days of accidental blurry backgrounds that make your cat look like a phantom feline. We're going to paint those backgrounds with the colors of the rainbow, and then some!
First things first, let's get our paws on the Instagram app. If you're still using a flip phone, I applaud your commitment to vintage cool, but this guide might be a tad beyond your current technological capabilities. Once you've opened that little camera icon, you're ready to embark on your colorful quest. Imagine yourself as a digital artist, the canvas is your Story, and your finger is your brush. Magical, right?
Must Read
- A Quiet Escape In The Suburbs: Visiting Union Pond Conservation Area
- Conquer Manitoulin’s Best View: Cup And Saucer Trail Parking & Trailhead Guide
- 140 Kilometers Of Adventure: Biking The Greater Niagara Circle Route
- Scenic Routes For Every Fitness Level: The Best Walking Trails Niagara Falls Offers
- Eksplorasi The Highest Point Of The Escarpment: Pretty River Provincial Park
The Magic Wand Method: Unleash the Gradient!
This is where the real fun begins, my friends. This method is so simple, it’s almost embarrassing. You can create these gorgeous, swoon-worthy gradient backgrounds that look like they were professionally designed. Seriously, you'll be looking at your Stories and thinking, "Did I hire a graphic designer? Nope, just me and my brilliant brain!"
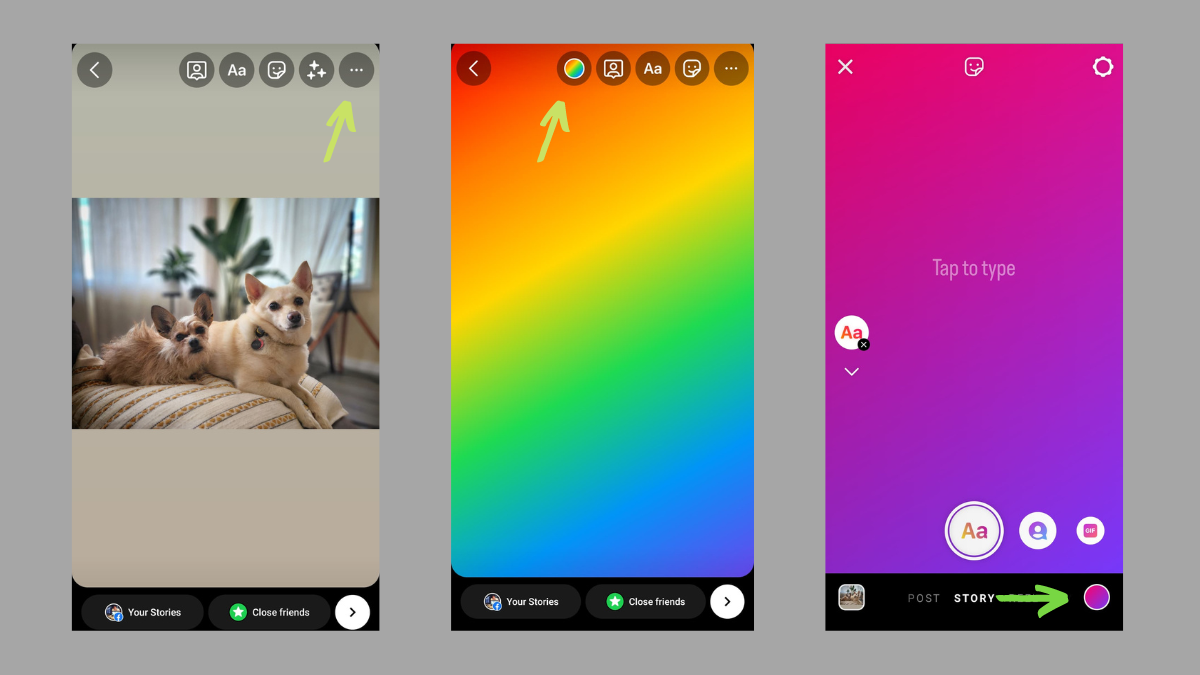
Here's the lowdown: once you've taken your photo or selected one from your camera roll, you'll see a bunch of tools at the top. Don't be intimidated by all those little icons. They're your trusty sidekicks in this quest for a killer Story. Look for the little marker pen – it's usually a squiggle or a pen tip icon. Tap that bad boy.
Now, you'll see a row of color options at the bottom. This is your palette. Go ahead, tap on a color. See it change? Revolutionary, I know! But here’s the secret sauce. Instead of just tapping and releasing, press and HOLD down on a color. Keep your finger on it. Then, with that same finger, slowly drag your finger upwards towards the top of the screen. Voilà! A beautiful gradient will appear, fading from the color you selected to transparent. It’s like magic, but with algorithms! Mind. Blown.

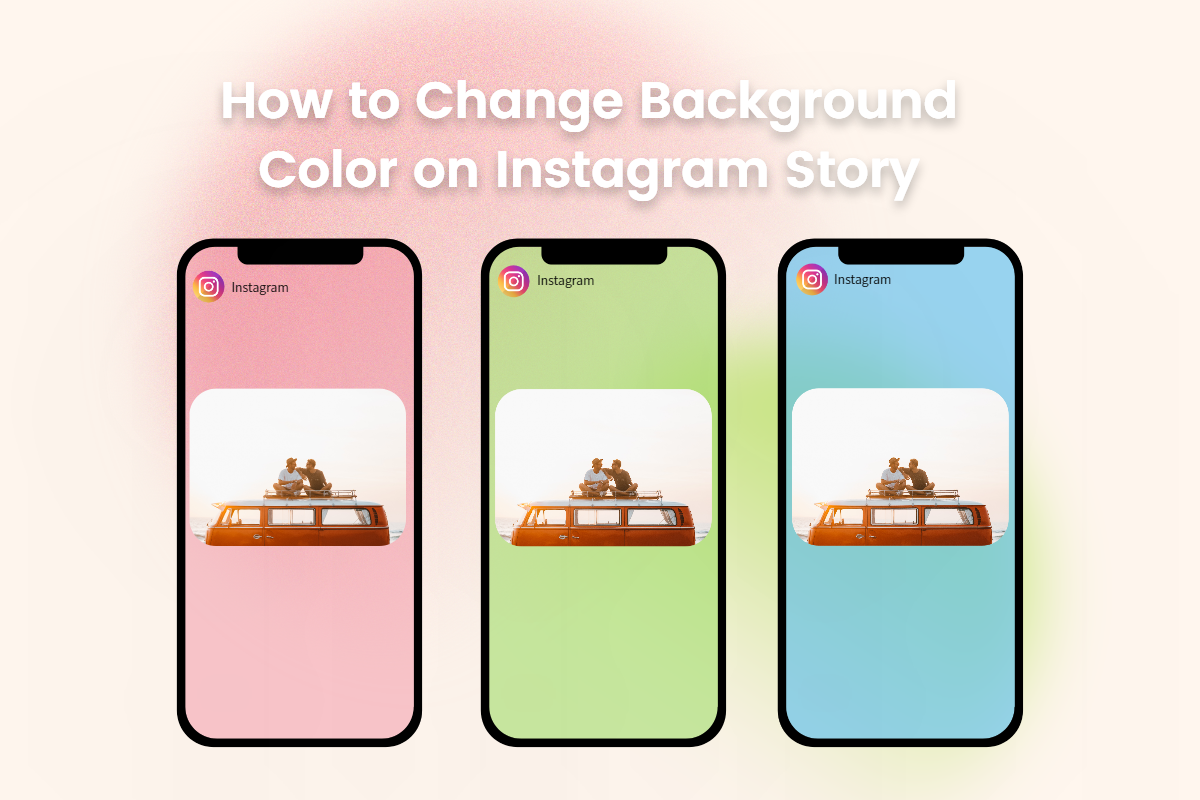
You can do this with any of the colors provided. Want a fiery sunset vibe? Pick red and drag up. Feeling serene and ocean-like? Go for blue. Feeling a bit rebellious and want to combine pink and purple? You've got it! Experiment! There are no rules here, except maybe not using neon green and hot pink together unless you're going for a very specific, retina-burning aesthetic.
This gradient trick is perfect for when you want a soft, ethereal background that doesn't overpower your photo or video. It adds a touch of sophistication without looking like you tried too hard. Which, let's be honest, is the ultimate goal of all our social media endeavors, right? To look effortlessly amazing.
The "Solid as a Rock" Method: For When You're Feeling Bold!
Sometimes, you don't want a fancy gradient. Sometimes, you just want a solid, unapologetic block of color. Maybe your photo is already super busy, and you need a clean, minimalist backdrop. Or maybe you just really love the color teal and want to declare your undying devotion to it. Whatever your reason, this method is your jam.
It's practically the same starting point as the gradient method. You've got your photo, you've tapped the marker pen, and you're looking at your color palette. Here's the trick: instead of pressing and holding, you're going to tap and HOLD on the COLOR ITSELF, and then DRAG YOUR FINGER ACROSS THE ENTIRE SCREEN. Yes, the entire screen. Think of it as painting a giant, glorious wall with your favorite hue. Keep your finger down and move it from one side to the other, up and down, all over the place. As long as you keep holding, that color will stick. It’s like a digital graffiti artist has been unleashed!

This is also a fantastic way to create a consistent brand aesthetic if you’re a business or a creator. You can use your brand colors for every Story, making your profile instantly recognizable. Imagine people scrolling through their feed and thinking, "Ooh, that's definitely from [Your Awesome Brand Name]! They've got style, those guys!"
And don't limit yourself to the standard colors! Instagram often throws in some extra shades, and if you’re feeling really adventurous, you can even use the eyedropper tool (that little pipette icon that appears when you tap and hold a color in the marker tool). Tap that, and then tap on any color in your photo. Boom! You’ve just sampled a color directly from your image and made it your background. It’s like having a personal color chameleon living in your phone.
The Text Tool Trick: Because Sometimes, Less is More (or More of the Same Color!)
Okay, this is for those moments when you're feeling a little extra, or when you just want to add a tiny bit of background color behind your text. It's a little less obvious, but once you know it, you’ll be doing it all the time.
First, you'll need to add some text to your Story. Tap the "Aa" icon. Type something, anything! Then, at the bottom, you'll see those familiar color options. Now, here's where it gets interesting. When you tap on a color, it usually just changes your text color. But if you tap and HOLD on one of the colored circles at the bottom, it will create a solid background behind your text. Pretty neat, huh? It's like giving your words a little stage to shine on.
You can then move that text box around, resize it, and rotate it to your heart's content. Want a little pop of yellow behind your sassy caption? Done. Need a calming blue behind your inspirational quote? Easy peasy.
But wait, there’s more! If you double tap on the color circle while you're holding it down, it will cycle through different background options for your text. Sometimes it’s a solid block, sometimes it’s a semi-transparent block, and sometimes it even adds a little underline. It’s like a surprise party for your text!
This is particularly useful if you want to make sure your text is super readable, even if your background image is a bit busy. It’s like giving your words their own personal spotlight. No more squinting to read that brilliant thought you had at 3 AM!
The "Surprise Me!" Method: When You're Feeling Lucky!
Okay, this isn't an official Instagram feature, but it's a fun little game you can play with yourself. You know how you can add stickers and GIFs? Well, sometimes, the backgrounds of those stickers and GIFs are just… perfect.
So, here's the challenge: go into your Story, add your photo or video. Then, tap the sticker icon. Browse through some of your favorite GIFs or stickers. Now, here’s the mind-bending part: find a GIF or sticker with a solid or gradient background that you love and then just… leave it there. Don't resize it, don't move it. Just place it on your Story and then tap the eraser tool.
Yes, you heard me! With the eraser tool, you can actually erase the content of the GIF or sticker, leaving behind just its background! It’s like a background extraction tool, but way more fun and slightly more confusing. You’ll have to play around with it a bit, but once you get the hang of it, you can achieve some truly unique and unexpected background colors and textures. Think of it as reverse engineering a sticker. Who knew sticker dismantling could be so rewarding?
This is for the adventurous souls, the ones who like to push the boundaries of what's possible. It might take a few tries, and you might accidentally erase your entire Story at some point (been there, done that, have the screenshots to prove it!), but the results can be stunning. Plus, it's a great way to impress your friends with your obscure Instagram knowledge. "Oh, this background? Yeah, I just, you know, deconstructed a dancing banana GIF. No biggie."
So there you have it, folks! A whirlwind tour of the wonderful world of Instagram Story background colors. From subtle gradients to bold blocks, and even a bit of sticker-based sorcery, you've got the power to make your Stories pop. Now go forth and paint the digital town red (or blue, or green, or whatever color tickles your fancy)! And remember, if all else fails, a well-placed emoji can sometimes distract from a less-than-stellar background. Happy Story-ing!